Category Archives: Flash

TUTORIAL – Create realtime multiplayer games using Player.IO (PART 4 – Lobby)

part 1 ] – [ part 2 ] – [ part 3 ] – [ part 4 ]

STEP 1 – List rooms

So far, we’ve hardcoded the name of the room “Paris”, but in case your game becomes wildly popular, you wouldn’t want everyone in just one room. In fact, Player.io has a limit of 45 people per room. This might seem limiting, but 45 people is very crowded. If you want to create some kind of massive multiplayer “World of Warcraft” kind of game, you would have to divide you world into separate rooms. Note that room is just a concept, it doesn’t have to be a place with 4 walls, so you can just say “every 10 meters is a new room”.

So remember in the previous examples, the handleConnect function had a line like this:

client.multiplayer.createJoinRoom(roomName,roomType,true,{},{},onJoin,handleError);

The roomName was always hardcoded as Paris, but let’s say now you can have more than one room for your game. You would want a way to list them all. For that, use the following code:

private function listRooms(roomType:String):void {
client.multiplayer.listRooms(roomType,{},100,0,onListRooms);
}

private function onListRooms(array:Array):void {
   for each(var room:RoomInfo in array) {
      // code to display room
}
}

The name of the room is room.id, which can be used as a parameter for roomName when calling createJoinRoom. Also note that you can call joinRoom instead of createJoinRoom since the room already exists.


STEP 2 – Filter list

One thing that could be useful is to filter the list of rooms by some parameters. Perhaps the lobby includes different games or different types of games, where the play can choose which one to join. For that, you need to make sure the room has enough information when it gets created. Change the createJoinRoom call as follow:

client.multiplayer.createJoinRoom(roomName,roomType,true,{game:"MyGameType"},{},onJoin,handleError);

Now, when you list the room in the onListRooms function, the room object will have the game type saved as room.data.game.

private function onListRooms(array:Array):void {
   for each(var room:RoomInfo in array) {
      trace(room.id,"type is:",room.data.game);
}
}

Adding a parameter to the room also allows you to filter by game types on the server side when listing the room. For that, you will need to change a setting by going on the Player.IO (aka yahoo game network) web page.

First, navigate to your game inside the [My Game] section, and click on [Multiplayer] in the sidebar on the left. Then click settings, and enter “game” as one of the Search Columns. Now when you call listRooms, you can filter by game type:

private function listRooms(roomType:String):void {
client.multiplayer.listRooms(roomType,{game:"MyGameType"},100,0,onListRooms);
}

To see a demo of a lobby with the Tutorial, DrawingBoard and Shoot-Em-Up example, click here.

As a reminder, the source code for all the examples in this tutorial is on GitHub.

This is it for now. I hope you enjoyed this tutorial. Eventually, to produce better multiplayer games, you will need to work on the server side, so I might produce another tutorial at a later time.

Meanwhile, check out this flash game that uses Player.IO, released online and on both Apple App Store and Google Play store:

Blink Pong (Android, IPhone/iPad, Source code on GitHub)


part 1 ] – [ part 2 ] – [ part 3 ] – [ part 4 ]

TUTORIAL – Create realtime multiplayer games using Player.IO (PART 3 – Game example)

part 1 ] – [ part 2 ] – [ part 3 ] – [ part 4 ]

At this point, you should already have enough to produce a realtime multiplayer game. You’ve got a client that sends a message to the server and gets broadcasted back to other clients.

I still wanted to add this section, because there are many ways to handle multiplayer once you have the system hooked up. Depending on which method you use, synchronization can be tricky.

Let’s go over a few examples where we use the system to produce a multiplayer app or game.

Example 1 – Collaborative Drawing board

Let’s the program you wrote previously as a baseline. You don’t have to change anything, except just remove the code that sends “Hello, World” when you click on the screen.

First, we’re going to implement our drawing program as single player. Add the following code in the constructor:

var color:uint = uint(uint.MAX_VALUE*Math.random());

stage.addEventListener(MouseEvent.MOUSE_DOWN,
   function(e:MouseEvent):void {
penDown(e.stageX,e.stageY);
});

stage.addEventListener(MouseEvent.MOUSE_MOVE,
   function(e:MouseEvent):void {
      if(e.buttonDown) penMove(e.stageX,e.stageY,color);
});

We also need to implement the penDown and penMove actions:

private function penDown(x:Number,y:Number):void {
graphics.moveTo(x,y);
}

private function penMove(x:Number,y:Number,color:uint):void {
graphics.lineStyle(1,color);
graphics.lineTo(x,y);
}

This code lets you draw when you move the mouse with the left button down. Now we need to make sure the draw commands are broadcasted.

Replace the code that you added in the constructor as follow:

stage.addEventListener(MouseEvent.MOUSE_DOWN,
   function(e:MouseEvent):void {
connection.send("penDown",e.stageX,e.stageY);
});

stage.addEventListener(MouseEvent.MOUSE_MOVE,
   function(e:MouseEvent):void {
      if(e.buttonDown)
connection.send("penMove",e.stageX,e.stageY,color);
});

You will also need to add message handlers inside your onJoin function:

private function onJoin(connection:Connection):void {
log("Successfully joined room:",connection.roomId);
   this.connection = connection;
connection.addMessageHandler("penDown",
      function(m:Message,x:Number,y:Number):void {
penDown(x,y);
});
connection.addMessageHandler("penMove",
      function(m:Message,x:Number,y:Number,color:uint):void {
penMove(x,y,color);
});
}

To test the collaborative whiteboard click here.


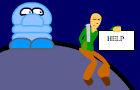
Example 2 – Multiplayer shoot-em-up

Another way to use the bounce server, rather than broadcast commands, is to broadcast the self state. For our multiplayer shoot-em-up, we will broadcast the x,y coordinates of the space ship, and add a shoot command.

Let’s start by adding our listeners inside the constructor:

stage.addEventListener(MouseEvent.MOUSE_DOWN,
   function(e:MouseEvent):void {
      if(connection)
connection.send("shoot",e.stageX,e.stageY,client.connectUserId);
});
stage.addEventListener(MouseEvent.MOUSE_MOVE,
   function(e:MouseEvent):void {
     if(connection)
connection.send("moveShip",e.stageX,e.stageY,client.connectUserId);
});
addEventListener(Event.ENTER_FRAME,animateScene);

Also add the message handlers inside the onJoin function:

private function onJoin(connection:Connection):void {
log("Successfully joined room:",connection.roomId);
   this.connection = connection;
connection.addMessageHandler("shoot",
function(m:Message,x:Number,y:Number,id:String):void {
shoot(x,y,id);
});
connection.addMessageHandler("moveShip",
      function(m:Message,x:Number,y:Number,id:String):void {
moveShip(x,y,id);
});
}

The animateScene will be called in a loop continuously to animate and display the spaceship and missiles. Next, we’re adding our moveShip and shoot functions:

private function getShip(id:String):Object {
   return ships[id] ? ships[id]:
(ships[id] = {color:uint(uint.MAX_VALUE*Math.random())});
}

private function moveShip(x:Number,y:Number,id:String):void {
   var ship:Object = getShip(id);
ship.x = x;
ship.y = y;
}

private function shoot(x:Number,y:Number,id:String):void {
   var ship:Object = getShip(id);
ship.x = x;
ship.y = y;
createMissile(x,y,-10,0);
createMissile(x,y,10,0);
createMissile(x,y,0,10);
createMissile(x,y,0,-10);
}

private function createMissile(x:Number,y:Number,xmov:Number,ymov:Number):void {
missiles[Math.random()] = {x:x+xmov,y:y+ymov,xmov:xmov,ymov:ymov};
}

Note that you’ll also need to define the ships and missiles member variables as objects. Since we have to remember each ship’s position in the screen, we have to index them using each player’s ID. We also index missiles by a random ID to track their trajectory and remove them when they exit the screen. Next we have the animateScene function:

private function animateScene(e:Event):void {
graphics.clear();
   for each(var ship:Object in ships) {
graphics.lineStyle(1,ship.color);
graphics.moveTo(ship.x,ship.y-10);
graphics.lineTo(ship.x+10,ship.y);
graphics.lineTo(ship.x,ship.y+10);
graphics.lineTo(ship.x-10,ship.y);
graphics.lineTo(ship.x,ship.y-10);
}
graphics.lineStyle(1,0xFF0000);
   for(var mid:String in missiles) {
      var missile:Object = missiles[mid];
graphics.moveTo(missile.x,missile.y);
graphics.lineTo(missile.x+missile.xmov,missile.y+missile.ymov);
missile.x += missile.xmov;
missile.y += missile.ymov;
if(missile.x>stage.stageWidth || missile.x<0
|| missile.y>stage.stageHeight || missile.y<0) {
         delete missiles[mid];
}
}
}

Demo available here.

One thing that we can noticed is that the movement of the ship you control is not really that smooth. That’s because there is a delay for the message to go to the server and back. When making a game, you need to make sure that the controls are as responsive as possible. So rather than sending the coordinates of our own ship to the server and back, we will apply them directly. Change the MOUSE_MOVE event listener as follow:

stage.addEventListener(MouseEvent.MOUSE_MOVE,
   function(e:MouseEvent):void {
      if(connection) {
connection.send("moveShip",e.stageX,e.stageY,client.connectUserId);
moveShip(e.stageX,e.stageY,client.connectUserId);
}
});

You will also need to change the message handler to ignore messages that relate to your own ship.

connection.addMessageHandler("moveShip",
   function(m:Message,x:Number,y:Number,id:String):void {
      if(id!=client.connectUserId)
moveShip(x,y,id);
});

The ship should look a lot more responsive. See the difference in the demo here.

Now this raises a few questions. If the ship’s coordinates is slightly different than the one sent to the other player, how can we determine if a ship has been hit by a missile? The answer is simple. Simply do a collision check only on your own ship, and if a collision occurred, broadcast that message. While another player might see a missile colliding with your missile yet not damaging it, it’s not as frustrating as seeing your own ship explode when you clearly dodged a missile. In terms of real-time, you can never get perfect synchronization (unless you update the ship using the coordinates that made a roundtrip to the server and back, which deteriorates responsiveness).

So for our final test, we will test collision between the ship and the missiles. Inside the animateScene function at the end, add the following:

if(client && ships[client.connectUserId]) {
   var myShip:Object = ships[client.connectUserId];
   var rect:Rectangle = new Rectangle(myShip.x-10,myShip.y-10,20,20);
   for each(missile in missiles) {
      if(rect.contains(missile.x,missile.y)) {
// ship has been hit
gameOver = true;
connection.send("gotHit",client.connectUserId);
         break;
}
}
}

And add a message handler inside the onJoin function:

connection.addMessageHandler("gotHit",
   function(m:Message,id:String):void {
      delete ships[id];
log("Ship",id,"has been destroyed!");
});

You can check out the result here.


 Next >> TUTORIAL – Create realtime multiplayer games using Player.IO (Part 4 – Lobby)


part 1 ] – [ part 2 ] – [ part 3 ] – [ part 4 ]

TUTORIAL – Create realtime multiplayer games using Player.IO (PART 2 – Client)

part 1 ] – [ part 2 ] – [ part 3 ] – [ part 4 ]

By the end of this part, you’re already have enough to create a multiplayer game, so try to hold the excitement and pay attention!

STEP 1 – Import the SDK

First, you’ll need to download the SDK. In the Yahoo Games Network home page, click SDK and Download SDK. The latest version at the moment is 3.06.

The SDK has a lot of examples of pre-made applications, but all you need is the library.

Open : Flash > New Game > Flash > PlayerIOClient.swc

I presume you all now how to import a swc file in flash, but as a refresher this is how you do it:

  • In Flash Builder: In the Menu > Projects > Properties > ActionScript Library Build Path > Add Swc… > Browse
  • In Flash CC: In the Menu > File > Publish Settings… > Click the wrench icon ActionScript Settings next to [Script: Actionscript 3.0] at the top. > Click on Add New Path then click on Browse to SWC file


Then select your SWC file and it will get added to the project. For simplicity, I usually add a folder instead (inside the folder containing my project) and copy all the SWC I need in there.

Next, we’ll write some code.

STEP 2 – Connect to Yahoo’s network

To connect to Yahoo Games Network, make the following call. For now, simply put it in your root class’s constructor:

var game_id:String = "dobukiland-ymhkxklve0qg9ksunqrsq";
var username:String = "user"+Math.random();

PlayerIO.connect(stage,game_id,"public",username,"",null,handleConnect,
handleError);

The game_id variable would be the ID you get after you’ve setup your game’s server.
The username is normally an id that helps you identify your user. Since we don’t really care about tracking users, we can just set it to something random.

Next, you will need to define the handleError and handleConnect functions.

private function handleError(error:PlayerIOError):void{
   trace(error);
}

private function handleConnect(client:Client):void {
   trace("Successfully connected to Yahoo Games Network");
   this.client = client;
}
This will do for now, we’ll add more in handleConnect.

STEP 3 – Enter a room

Use one single function to create and enter a room. The room gets created automatically if it doesn’t exists, otherwise you just enter the existing room. The code will be added in handleConnect.

private function handleConnect(client:Client):void {
   trace("Successfully connected to Yahoo Games Network");
   this.client = client;
   var roomName:String = "Paris";
   var roomType:String = "bounce";
   client.multiplayer.createJoinRoom(roomName,roomType,true,{},{},onJoin,handleError);
}

roomName is the name of the room and can be anything you want, but roomType has to be “bounce”. Normally, you would define a room type, but since you didn’t write the server code, the only room type available to you is the built-in “bounce” room type provided by default.

STEP 3 – Handle messages

Moving along, we now have to implement onJoin

private function onJoin(connection:Connection):void {
   trace("Successfully joined room:",connection.roomId);
   this.connection = connection;
connection.addMessageHandler("send",function(m:Message):void {
      // code for handling message
});
   this.connection = connection;
}

By using addMessageHandler, we’re listening for messages coming from the server. It can be any message type. In this case, I’m handling “send” messages because that’s the type we’re going to use to send our messages.

STEP 4 – Send messages

Now we’re going to send and receive a message. We will need a function that sends the message, and we’ll also need to handle the message that we get back. Let’s say for now, we just send a “Hello, World” and trace it on the receiving end.

public function send(message:String):void {
   if(connection) {
connection.send("send",message);
}
}

private function onJoin(connection:Connection):void {
   trace("Successfully joined room:",connection.roomId);
   this.connection = connection;
connection.addMessageHandler("send",
      function(m:Message
,message:String):void {
         trace(message);
      });
   this.connection = connection;
}

Note that we also modified added an extra parameter in our message handling function inside onJoin. The parameter is the message that we sent and got back from the server.

You can try to send your “Hello, World”. Let’s say clicking in the app sends the message. Add the following in your constructor:

stage.addEventListener(MouseEvent.CLICK,
   function(e:MouseEvent):void {
send("Hello, World");
});

You can try the demo here. I replaced trace by a log function that displays the message on the screen, but you get the idea. For the source code of this demo, click here.

 Next >> TUTORIAL – Create realtime multiplayer games using Player.IO (Part 3 – Game example)

part 1 ] – [ part 2 ] – [ part 3 ] – [ part 4 ]

TUTORIAL – Create realtime multiplayer games using Player.IO (PART 1 – Server)

[ part 1 ] – [ part 2 ] – [ part 3 ] – [ part 4 ]


This multi parts tutorial explains how to produce a multiplayer game using Player.IO’s SDK (Now called Yahoo Games Network SDK.)

Creating a multiplayer game, especially real-time, is always a daunting task for developers. Yet, the player.io API simplifies the task and makes it actually very easy. I’m going to explain in this tutorial how to produce a game using the API. The language used will be Actionscript, but the SDK supports other languages like Objective-C, Java (for mobile), Unity, C#. The server has to be implemented with C#, but it’s a lot easier than you’d expect.

I’m sure you’re all expert programmers, and have ways to optimize your code to create wonders, so in this tutorial I will just explain the bare absolute minimum to create a simple game.

STEP 1 – Get an account on Yahoo Games Network

As a shortcut, I always type “player.io” in the url bar because that’s what sticks to my mind. Since the company has been bought by yahoo, it shows a link to redirect to gamesnet.yahoo.com. You then proceed in signing-up with a new account with the link in the top right.

STEP 2 – Setup a game’s server

Once you’ve completed the signing-up, your first step is to setup your game’s server.

  • Click on My Games
  • + Create New Game
  • Choose a name (ex: “Dobukiland”)
  • You should see a message like this:

 Your game has been created!

Your next step should be to connect to your game. First, download the appropriate client library from our downloads section, and use your game id to authenticate to the Backend Game Services.

Dobukiland Game ID: dobukiland-ymhkxklve0qg9ksunqrsq


Ok, so we’re done with part 1 of this tutorial

(wait, what?!)

Right, you can actually skip the whole process of writing your server code, compiling your dll, testing locally, re-uploading to the server ect… Normally that’s what you would do to create your game, but remember in this tutorial, I’m only showing the bare minimum. Using the steps above, you’ve already been provided a server. It’s a very dumb one that simply broadcasts messages that you send to everybody in the same room. But that’s actually all you need to create a realtime multi-player game.

For more advance user, I will write more on setting up a local server in the later part of this tutorial. But for now, we’ll just go to the next step: Writing the client code.

 Next >> TUTORIAL – Create realtime multiplayer games using Player.IO (PART 2 – Client)


[ part 1 ] – [ part 2 ] – [ part 3 ] – [ part 4 ]

Implementing the High Score table for My Champion

Image

This post explains how to implement the leaderboard I used for my game My Champion. At the time, I was looking for a premade leaderboard that would be available on any portals. I first looked at the Mochi leaderboard but that one seem to be too resource intensive. So instead, I decided to implement my own. Since I didn’t want to support a server on my end, I had to find a free service for the backend. I ended up using Gamejolt’s API because it had a few features I was looking for, such as the ability to display a score that is not just a numeric value (like 1-0, 3-4…), and an “extra” field for putting whatever information I want.

A few interesting features of the resulting leaderboard are:
– Shows the flag of the player’s country, linking to a google search combining that country and the world “football”.
– Showing the profile picture if the player is logged into one of the major portals
– Linking to the player’s profile on that portal
– Showing an icon of the portal through which the game is played

Read the rest of this entry

Krapi Games, Krapi Comics, and Krapi Studio

I just started a new studio called Krapi Studio with Pokemon7777.

Some might be wondering why I waste time making such Krapi games. Well, the thing is, even if it was considered time wasted, it’s not that much time, since it doesn’t take me really long to make Krapi games. Also, by making games under Krapi studio, I’m relieved from the stress of making something good. Along the way, I don’t feel like my time is completely lost, since I learn new tricks, I train myself at making games faster, and I add another piece of Krap into our game collection. To say quite frankly though, we don’t make Krapi games on purpose at Krapi Studio. We really do our best, but we don’t stress about failing to make something good. That’s from my point of view, I don’t know about Pokemon7777.

Anyway, here is Krapi Studio first game (not counting OMGAF Dragon which is Krapier but was produced before):

Image Weedman

http://www.newgrounds.com/portal/view/621157

Also a comic to show we really don’t take our Krapi games seriously:

http://www.dobuki.com/omgaf-comics.html

140x90

I just released a game called Social Planets. It actually started out as a ludum dare challenge. It was about “Hitchhiker’s guide to the galaxy”, and although I didn’t have any knowledge of the book, I just thought I’d make a game about a dude hitchhiking from planet to planet. Visiting aliens and talk to them.

Then came the hard part: What do i make the alien say? I’m not a great writer, and at the same time, i try to turn this hold planet hoping thing into an adventure game. Well, after being not super satisfied with the result, i was willing to submit it to Newgrounds and readied myself for crappy reviews. But before doing that, I had an idea:

So if someone write the name of the planet that doesn’t exist, they end up on an empty planet (how boring). How ’bout instead, I put a “VACANT” sign, and let the player occupy the planet, with their own dialog, and uploading their own picture of the alien. Well, I’m not sure if it made the game more fun, but it surely made this an interesting experiment. So far we have ~400 new planets. Feel free to check out Social Planets on Newgrounds

Coding Trick of the Day: Removing event listeners on naked functions

This is mainly an ActionScript coding trick. I think it works in JavaScript but I’m not sure.

Many time, you want an event listener that only gets called once, or being able to stop the listener after a particular condition. For instance, you need the ENTER_FRAME event on a bullet until it reaches its destination or goes offscreen. When that happens, you need to remove the event listener. However, if you’re lazy like me, you will not define your listener like this:

addEventListener(Event.ENTER_FRAME, functionName);

but like this:

addEventListener(Event.ENTER_FRAME, function(e:Event):void { .... } );

That’s called using a naked function. It’s just convenient and easier to do than defining a whole new function somewhere for that. Also, if your function is small and not really important, it improves readability.

The problems comes when you have to remove the listener, because you don’t have any function name to do this:

removeEventListener(Event.ENTER_FRAME, functionName);

Fortunately, there’s a trick to remove the event listener within the function itself. It goes like this:

addEventListener(Event.ENTER_FRAME,
     function(e:Event):void {
          if(condition) {
              e.currentTarget.removeEventListener(
                 e.type,arguments.callee);
          }
     });

This will make the event listener remove itself.

Coding Trick of the Day: The Comment Swapper

On many occasion when I am programming, I want to test out a piece of code, then try another one, and go back and forth between the two. Sometimes, it’s to compare performance, other times I just want to compare the behaviors (It happens very often when testing animation).

It can be tedious to constantly comment/uncomment code. But thanks to the “Comment Swapper”, I can do this in one keystroke!

1   //*******
2   object.foobar1();
3   /*/
4   object.foobar2();
5   //*/

Try it out: by deleting/adding the slash (/) character at the beginning of line 1, you can instantly swap between the two chunks of code.


Saint Seiya Fan Game

ImageFor a while, I’ve been wanting to produce a game about Saint Seiya. I’m a big fan since I was young, and recently I’ve been watching the old episodes again. I thought eventually, when I get some free time in the future, I’d start working on it. Here’s the thing about “eventually”, “when I get free time”, or “in the future”. It never comes. Somehow, when God sees you slacking, he finds a way to give you a push. So Today, I just found out about another one of those game competitions: Zodiac Attack 2013

The idea is to create a game about the Zodiac sign. Well, that sounds like the perfect opportunity and incentive to start producing my Saint Seiya fan game! Unfortunately, the competition started in April, and it expired… this monday at 9am. Basically, there was about half a day left to submit a game… that means… I STILL had half a day to create my Saint Seiya game and submit it! ;-D

So that’s what I did. I rushed the production with doodle graphics, crappy UI and spaghetti programming, and delivered the first level of Knights of the Zodiac (the english translation of the french title “Les Chevaliers du Zodiaque”, which is Saint Seiya). The only thing not produced today was the music, which I composed in high school. Not sure if that abides to the rules of the compos, but it’s ok, I don’t expect to win anything. I’m just glad I finally started this project before “eventually getting some free time”.

Link to the game.